Integrating Contextual into a Wix site
Requirements
This setup assumes that you have already setup your App Key on the Dashboard.
Integration Steps
Step 1
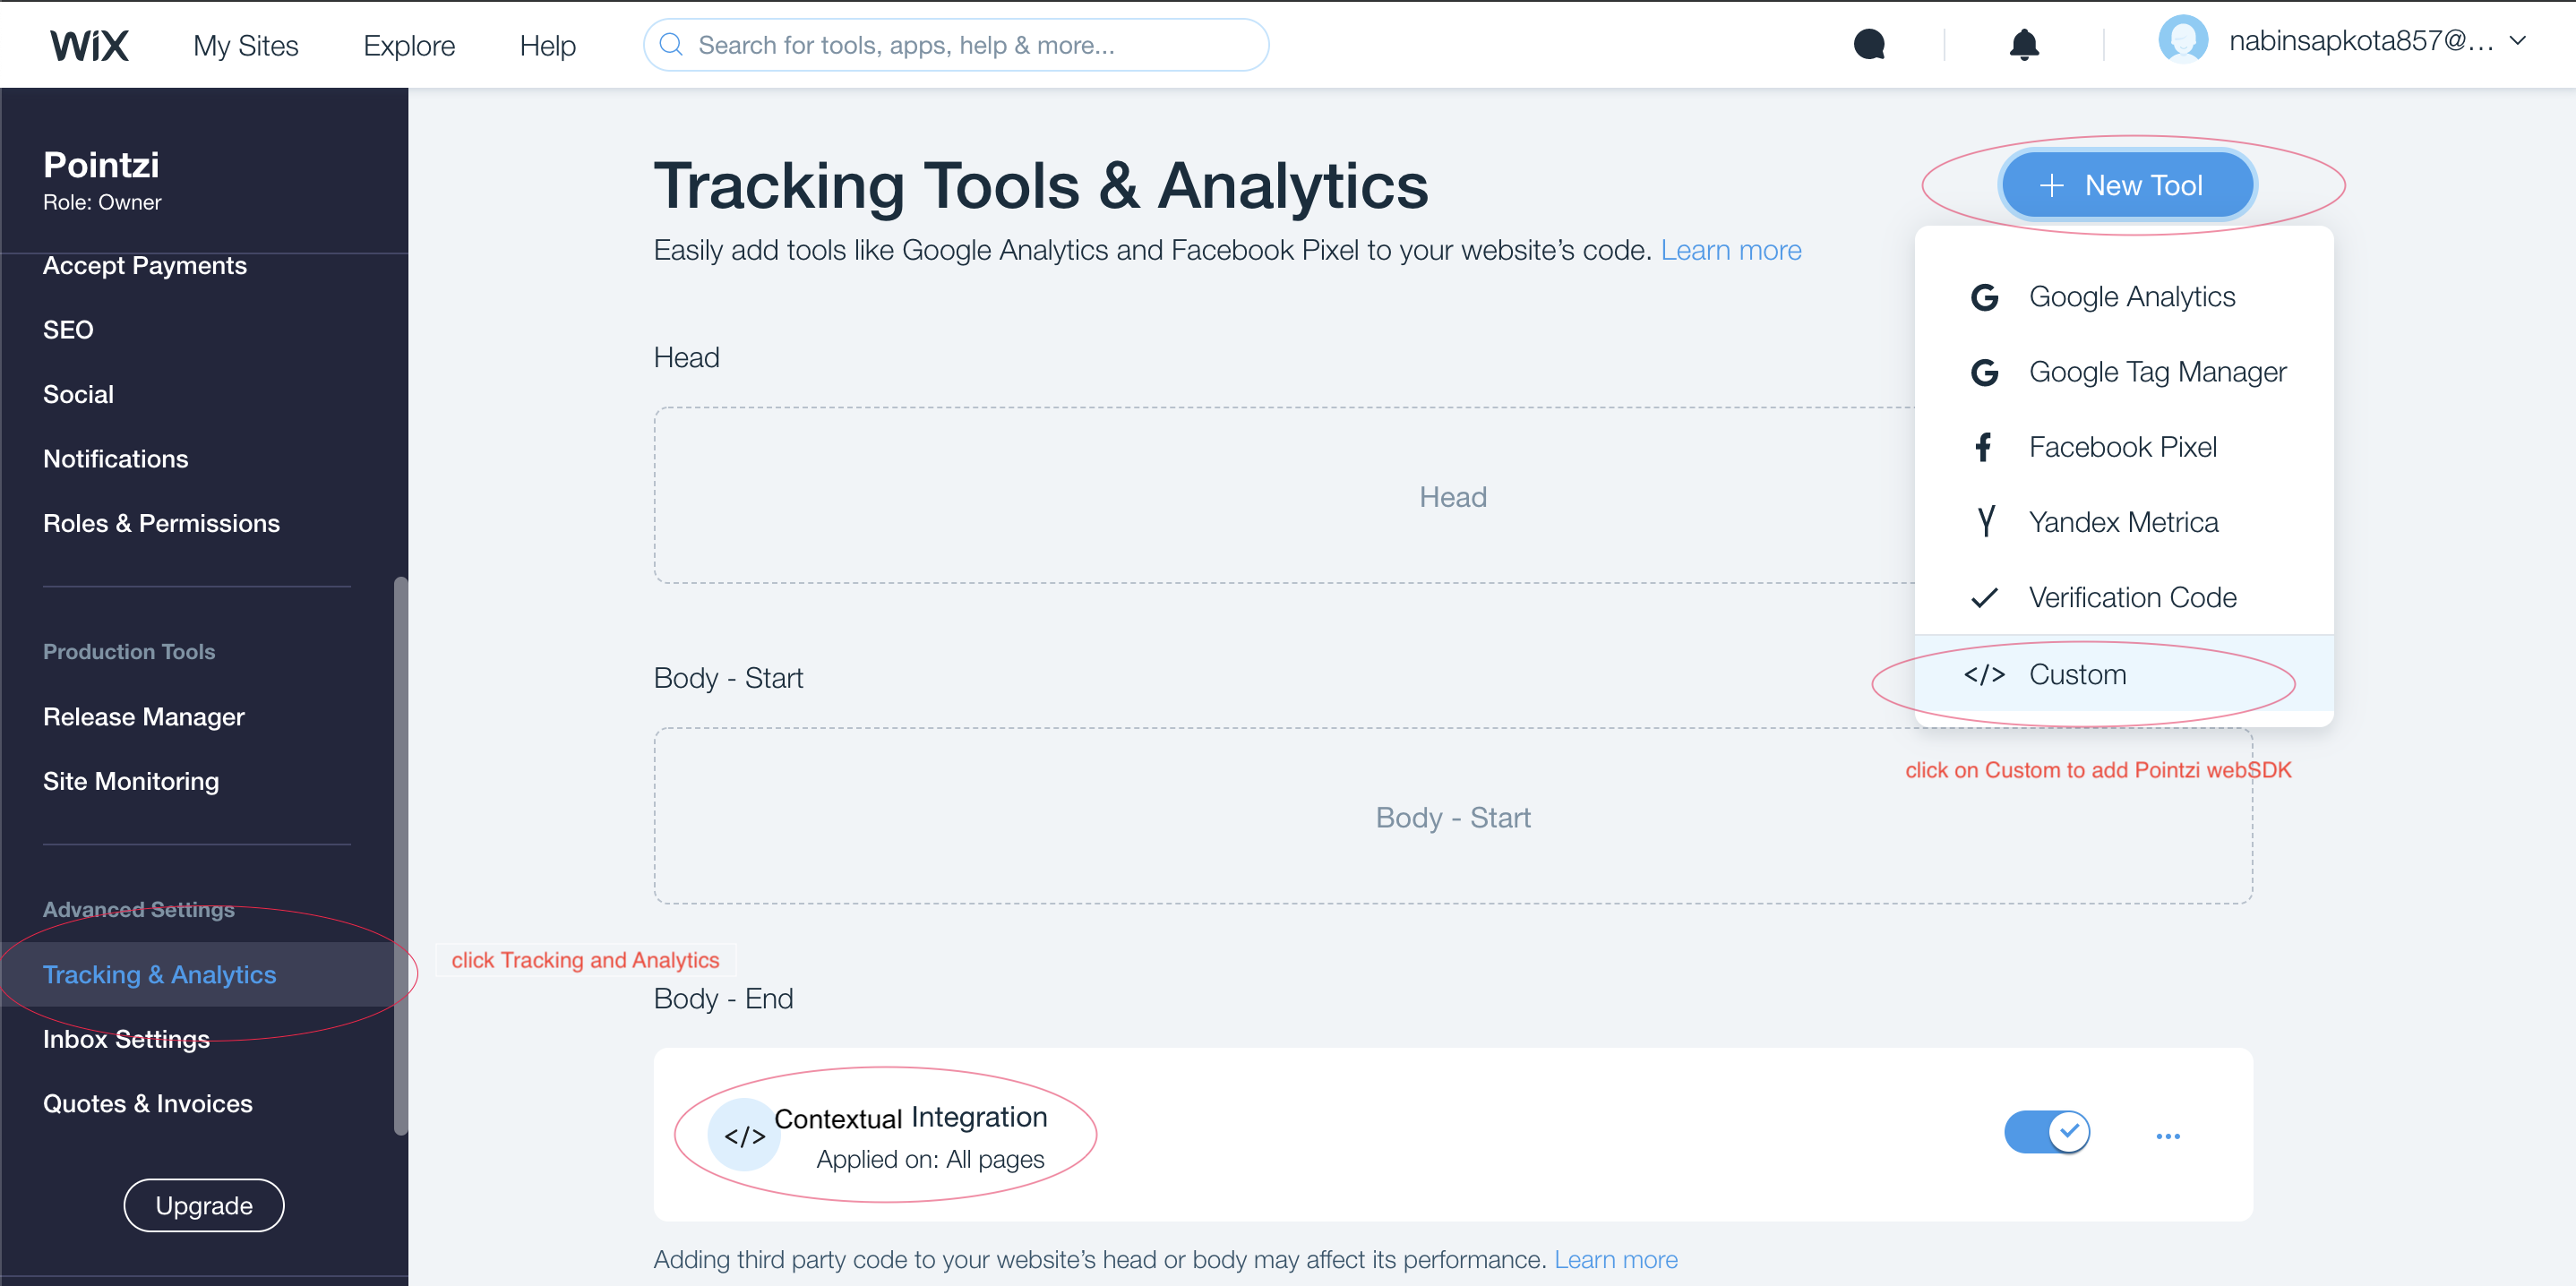
To integrate Contextual WebSDK on Wix website. First, Log into the Wix account and click on Setting. Scroll down the left-hand panel and click on Tracking and Analytics from Advanced settings.
Step 2
Now click on New tool and then select Custom, now paste the Contextual javascript snippet into the box titled ‘Paste the code snippet here’.
To get the Contextual Javascript snippet and initialisation code, please login to Contextual and go here
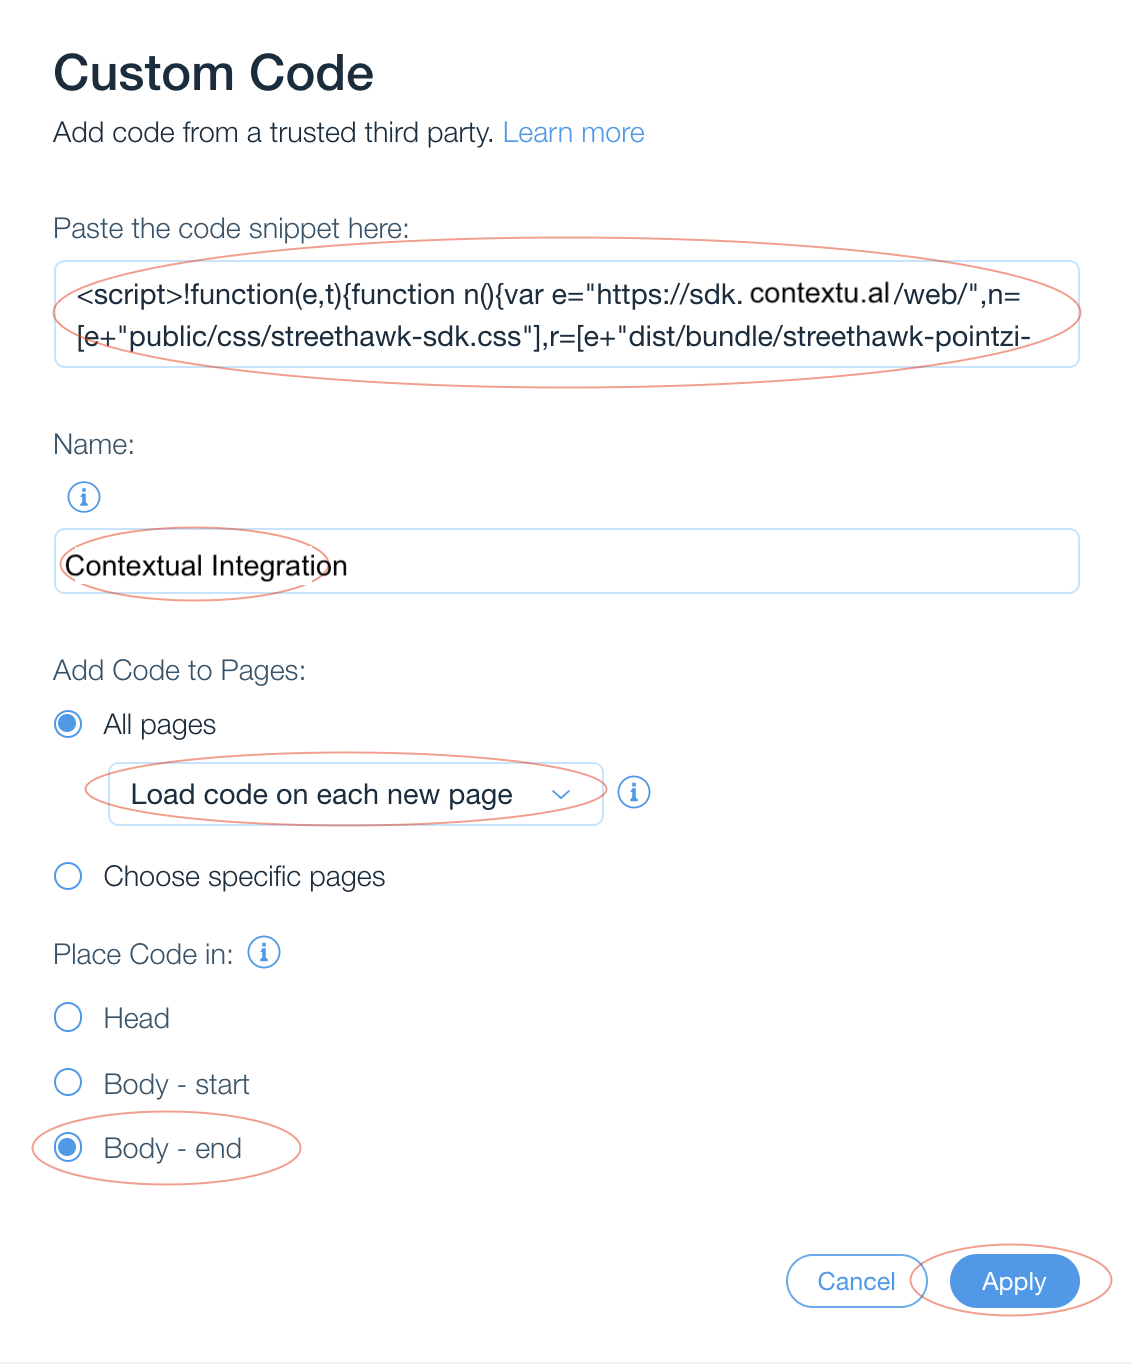
Once you are on the settings page select the web section then copy the script and initialisation code into the same box of Step 2, as shown in the image below.
Step 3
Then give the custom code a name (e.g Contextual Integration)
Step 4
In the section Add Code to Pages select Load code on each new page from the dropdown within the All pages part.
Step 5
In the section Place Code in select Body-end, to place the javascript code in the body. Choosing Body-end will generally ensure that the javascript triggers consistently.
Then click on Apply.
Note
This needs to be done on any page that you want to show Contextual content.
Step 6
Check that you have either set USER_ID or removed it from the initialisation script.
Note
USER_ID is the name you want to give to your install-id. This name is up to you. For more info visit the Tagging documentation. When you call register method, USER_ID is optional, you can set it later by sending user_id tag, it is string tag.
Step 7
Save the changes that you have made to your site and then go to your Wix site and reload the page.
Video of the Integration steps
Troubleshooting
If you have any issues integrating Contextual into your Wix site please visit the troubleshooting guide here