Skip to content

Angular integration

There are two main steps to integrate Contextual in your Angular App, both steps can also be done in slightly different ways. The following will go through the main ways to get Contextual integrated into your Angular App.

Step 1 - Add the Contextual script

The first way you can do this is by simply adding the script below directly into index.html file.

1
        <script>!function(e,t){!function(){var e="https://sdk.contextu.al/web/",n=[e+"styles.css"],o=[e+"main.js"];n.forEach(function(e){var n=t.createElement("link");n.rel="stylesheet",n.href=e,(t.body||t.head).appendChild(n)}),o.forEach(function(e){var n=t.createElement("script");n.setAttribute("defer",!0),n.setAttribute("async",!1),n.src=e,(t.body||t.head).appendChild(n)})}(),e.Contextual=e.Contextual||{ready:function(t){var n=0,o=setInterval(function(){if(e.Contextual.register||1200==n)return clearInterval(o),void(1200==n?console.error("Time out! Contextual sdk not loaded."):"function"==typeof t&&t());n++},100)}}}(window,document);</script>

The second way (recommended) is that you put the below code into a file (i.e contextual.js) you can then load the file into your index.html file.

1
        !function(e,t){!function(){var e="https://sdk.contextu.al/web/",n=[e+"styles.css"],o=[e+"main.js"];n.forEach(function(e){var n=t.createElement("link");n.rel="stylesheet",n.href=e,(t.body||t.head).appendChild(n)}),o.forEach(function(e){var n=t.createElement("script");n.setAttribute("defer",!0),n.setAttribute("async",!1),n.src=e,(t.body||t.head).appendChild(n)})}(),e.Contextual=e.Contextual||{ready:function(t){var n=0,o=setInterval(function(){if(e.Contextual.register||1200==n)return clearInterval(o),void(1200==n?console.error("Time out! Contextual sdk not loaded."):"function"==typeof t&&t());n++},100)}}}(window,document);

Once you have added above the code into a file such as public/js/contextual.js then all you need to do is add the below script tag into your index.html file.

1
        <script src="public/js/contextual.js"></script>

Step 2 - Contextual initilization

For Contextual to work properly you must initialize Contextual in your root component. The image below shows an example of the most common Angular root component.

Root component

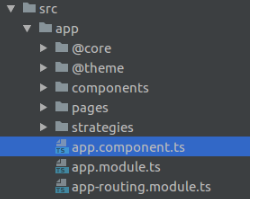
Then in the app.component.ts file, you simply need to add the initialization code into the ngOnInit method (as per the example below)

 1
 2
 3
 4
 5
 6
 7
 8
 9
10
11
12
13
    ngOnInit(): void {
     Contextual.ready(function() {

         // USER_ID is optional.
         //You can set it later by sending user_id tag. It is a string tag that is used to identify the user.
         Contextual.register( APP_KEY, USER_ID ).then(function() {
          // Send String Tag
                let key = "first_name";
                let value = "My First Name";
                Contextual.tag.string(key, value);
            });
        });
    }

USER_ID is optional but recomended, it cal also be set later. For example, wherever you identify the user to the analytics platform that you use, or when the user logs in.

Note

Make sure you replace APP_KEY with your own. Visit https://dashboard.contextu.al/installation/web?os=web -> API tab.

Setup Content-Security-Policy(CSP) (Optional)

If your website ( web app ) uses CSP to restrict resource loading then you should add the below settings to the white list to allow your website to use resources ( JS, CSS, images, etc... ) from Contextual.

 1
 2
 3
 4
 5
 6
 7
 8
 9
10
11
*.contextu.al

*.streethawk.com

*.storjshare.io

cdn.filestackcontent.com

https://static.filestackapi.com/picker/1.24.1/picker.js

https://static.filestackapi.com/picker/1.23.0/main.css

Note

If you want to use external resources e.g. loading a image from facebook then you should add "*.facebook.com" to the white list.


Last update: 2023-11-22